
Several years ago I knocked together a semi-permanent hunting camp. Below are a couple of the photos taken after the effort.


It worked fine and I've used it several times since I built it. I wanted to redo it in anticipation of our deer season opening next weekend. I also wanted something that wasn't tarp dependent and suitable for turning into a Mor's Supershelter. There are numerous write-ups on the web regarding these shelters, and there's a couple posts I've done on them in the past. One of the earlier ones that I built worked so well I couldn't sleep in a bag, it was too hot! That trip can be found here, A Double Overnighter.
So for this upgrade to the Rifleman's Camp I started by reinforcing the frame, removing the gear deck and collecting logs. All of the logs were either on the ground or standing dead. Once the frame was solid I started stacking and shoring up the logs.

Once mostly done with this part and knowing I wanted to use birch bark for shingling and waterproofing I set about collecting it from dead birch trees.

It's a pretty straight forward process. Using my hawk I just sort of unzip the bark in a straight line from as high as I can reach to as low as possible. As you can see below, large pieces can be harvested this way. Most of the time the bark is the last thing to rot in a birch tree before it falls.

Sometimes I get tears and end up with individual pieces which is okay because I can use them as overlaps, when two pieces come together you place these pieces over the seams.

Here's what the shingling process looks like. I start at the bottom, I also make use of logs to lean against the bark on the frame which holds the shingles in place.


Once I've covered it to my satisfaction I placed several more logs against it to keep everything in place.

As for the ridge pole I covered it repeatedly with birch bark, layer after layer making sure to put sheets over seams. When I was satisfied I covered much of it with loose soil and then a layer of moss. While it's unlikely a ember from the fire landing on the bark would ignite it I do the dirt and moss as an extra precaution. Overtime the moss will take hold, though sometimes I've had to add multiple layers on to get that to happen.
I also closed up the ends, using a method for building a wikiup, standing sticks and logs against each other to form a wall. Several layers of differing sizes, one placed in the gap the last two left and so on.


I also rebuilt the fire reflector. It's a combination of stone and wood, there are braces behind each stack of wood. It's held in place via tension from the horizontal sticks wedged between the trees with the upright support on the inside creating the tension.

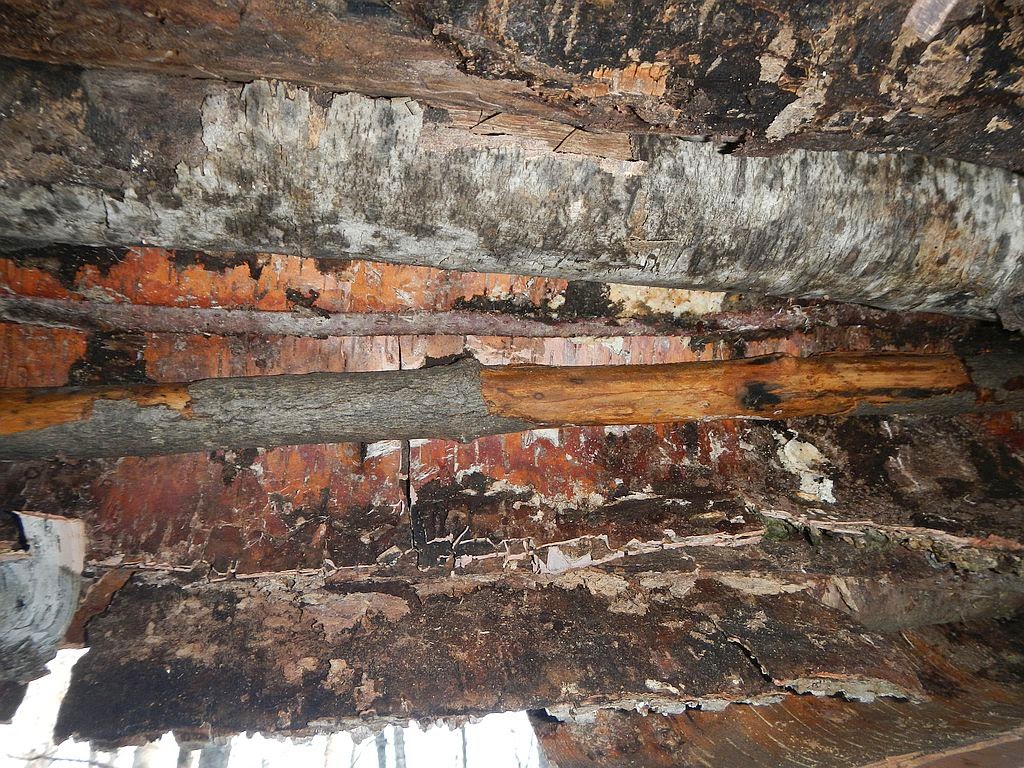
Some shots from the inside looking up at the roof, the logs, bark and overhang. When I am ready to hit the sack in this shelter later this winter I'll stretch a sheet of clear plastic across the front, end to end, roof to ground. With a long fire the heat will radiate through the plastic and remain in the shelter.
Showing the depth and length.

With the time change sunset was coming earlier than I am used to, running out of time before I could put the finishing touches on it. Still need to fill the bedding area with leaves, lots of them. On this I'll put a all weather reflective tarp, reflective side up obviously. Then my pad and so on. Overall I am satisfied with it, still have a few other things to knock out and finalize but it's ready to go.


Thanks for taking a look!
It worked fine and I've used it several times since I built it. I wanted to redo it in anticipation of our deer season opening next weekend. I also wanted something that wasn't tarp dependent and suitable for turning into a Mor's Supershelter. There are numerous write-ups on the web regarding these shelters, and there's a couple posts I've done on them in the past. One of the earlier ones that I built worked so well I couldn't sleep in a bag, it was too hot! That trip can be found here, A Double Overnighter.
So for this upgrade to the Rifleman's Camp I started by reinforcing the frame, removing the gear deck and collecting logs. All of the logs were either on the ground or standing dead. Once the frame was solid I started stacking and shoring up the logs.
Once mostly done with this part and knowing I wanted to use birch bark for shingling and waterproofing I set about collecting it from dead birch trees.
It's a pretty straight forward process. Using my hawk I just sort of unzip the bark in a straight line from as high as I can reach to as low as possible. As you can see below, large pieces can be harvested this way. Most of the time the bark is the last thing to rot in a birch tree before it falls.
Sometimes I get tears and end up with individual pieces which is okay because I can use them as overlaps, when two pieces come together you place these pieces over the seams.
Here's what the shingling process looks like. I start at the bottom, I also make use of logs to lean against the bark on the frame which holds the shingles in place.
Once I've covered it to my satisfaction I placed several more logs against it to keep everything in place.
As for the ridge pole I covered it repeatedly with birch bark, layer after layer making sure to put sheets over seams. When I was satisfied I covered much of it with loose soil and then a layer of moss. While it's unlikely a ember from the fire landing on the bark would ignite it I do the dirt and moss as an extra precaution. Overtime the moss will take hold, though sometimes I've had to add multiple layers on to get that to happen.
I also closed up the ends, using a method for building a wikiup, standing sticks and logs against each other to form a wall. Several layers of differing sizes, one placed in the gap the last two left and so on.
I also rebuilt the fire reflector. It's a combination of stone and wood, there are braces behind each stack of wood. It's held in place via tension from the horizontal sticks wedged between the trees with the upright support on the inside creating the tension.
Some shots from the inside looking up at the roof, the logs, bark and overhang. When I am ready to hit the sack in this shelter later this winter I'll stretch a sheet of clear plastic across the front, end to end, roof to ground. With a long fire the heat will radiate through the plastic and remain in the shelter.
Showing the depth and length.
With the time change sunset was coming earlier than I am used to, running out of time before I could put the finishing touches on it. Still need to fill the bedding area with leaves, lots of them. On this I'll put a all weather reflective tarp, reflective side up obviously. Then my pad and so on. Overall I am satisfied with it, still have a few other things to knock out and finalize but it's ready to go.
Thanks for taking a look!
Looks good!
ReplyDeleteReally cool setup. I could get comfy in something like that, but....
ReplyDeleteDoes the weight of the entire construction not concern you?
I mean that is a lot of wood leaning onto the still relatively fresh (looking) frame and there will be a lot of snow on that too. The moss might be taking up a lot of rainwater as well. How about wind? Is that a factor in that part of your woods?
Not that I really doubt your own judgement on this, but just thinking y'know.
Valid concerns.
DeleteThe camp is situation in a south north fashion, most of our wind is out of the south so most of the time the wind is passing through the camp not pushing the structure. Behind the shelter is a copse of dense pines than runs from the west and wraps to the north, this is a natural wind brake and prevents strong westerlies and north west winds from driving into the shelter.
The frame is reinforced through out though it's tough to see in the images. There are a couple verticals that are supporting the ridge beam that are in addition to the frame which on one end is a reenforced triangle with support both vertical and horizontal. The other is a tripod with a living tree.
The angle of the back helps with snow load, it is steep enough that it isn't going to be supporting snow. With our snow it is very light and powdery. It'll build at the bottom more and rise to the top back of the shelter, snow supporting snow and not so much on the structure itself.
The main ridge beam is a 8" in diameter tree that is sound, it isn't going to break, but it also doesn't have to support the total weight, there are two ancillary beams with it.
You'd have to build one or see this one in person to really get a grasp on how strong it is.
Darn good! That should do the job well! Good luck with the season. Hoping to see a post with a harvest in the near future!
ReplyDeleteWhat a great looking camp ! How long did it take you to build this ? Only thing missing is a nice 10 pointer hanging from a tree .
ReplyDeleteChuck
Thanks Chuck.
DeleteAbout six hours all in.
Looks like a great base to hunt from mate! some beautiful scenery and great place to escape. well done
ReplyDelete