27 December 2010

The Kitchen ~ Behind Enemy Lines ~

I've been married twenty years and still cannot navigate my wife's kitchen safely or efficiently. Sometimes I would swear she rearranges, moves the contents of cabinets and drawers on a weekly if not daily basis, nothing ever seems to be in the same place twice! Then there is the fact that the whole thing is booby-trapped, I am not kidding. I have to deal with IFDs and DTLs if I want to do something in the kitchen. She's 5'5" and sometimes doesn't get the higher items exactly where they should be so that when I open something I'm often hit in the head by the improvised falling device (IFDs), then there is fact that I often pick things up by the lid or top of the vessel/jar/container. Ever picked a three pound pickle jar up only to discover in slow motion horror that the lid wasn't quite tight, the echoing "NO-O-O-O" as the jar smashes into the floor? yea, she didn't tighten the lid, (DTLs). Now she would say, "I can't believe after twenty years you still pick things up by the lid!" To which I would reply, "I can't believe after twenty years you still don't tighten lids!". we really do have a wonderful relationship.

I try to make it a point of cooking on her birthday and today is her birthday. This year I decided to go about it differently. I committed myself to a tactical exercise where I drop myself behind enemy lines, into a HOT LZ if you will, where I will pack in everything I need, use my equipment exclusively and then bug out when it's over.

Mission Prep 1500 HOURS

Go time is at 1700, I needed supplies and I needed them fast. I had previously decided on my killer beef & vegetable soup so I needed some fresh vegetables and some prime stew beef. Off to market.

Suited Up 1600 HOURS

Supplies and gear stowed in my Maxpedition Gearslinger Kodiak pack. Kitted out with IFAK- E&E kit- multiple illumination devices and enough edges to cut my way out of Cambodia.


Insertion Time 1700 Hours
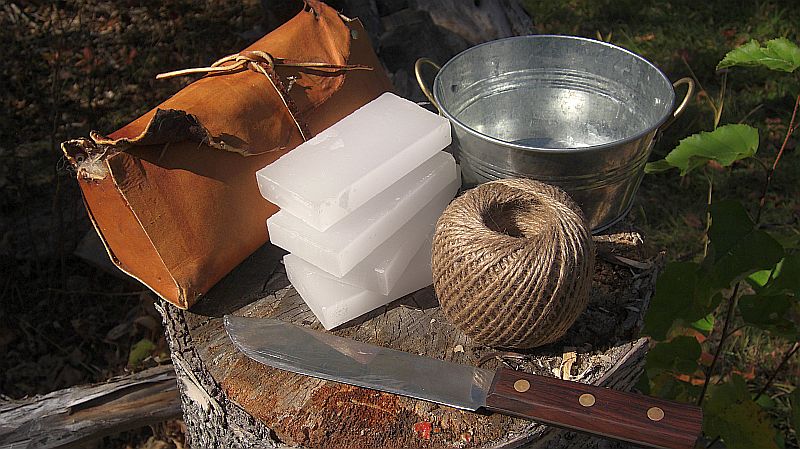
In the LZ covertly, you'd think I just HALO'd in as no one knew I was behind the line. Breaking out the tools needed I started with my optimal tactical medium speed moderate drag cutting board and placed the tools I would be using on it. Of course I took the time to take a tactical picture or two! My selection on weaponry was primarily related to recent acquisitions and happened to have already been in the bag.


Not wasting time I set to work, quickly slicing through the attack onions, knowing I had only a small window of opportunity to avoid their wicked tear gas I put the big BK9 into action.


The big Becker made short work of the onions, Ginsu Madman Trophy earned.

Rolling into the shadow dwelling 'shrooms I used an assortment of edges. The Becker Necker worked wonderfully, the BK2 not so much. The blade was extremely sharp but the edged pry bar was just a little over the top for the work at hand. Strangely enough the big BK9 being somewhat slimmer proved to be a great slicer here as well.


Moving well at this point, ahead of schedule I started in on the pepper patrol. Again it was the Becker Necker and the BK9 on the front line.


Progress, we're making progress!


Time to cut the silent stalkers down to bite sizes!


Forgoing all the edges but the BK9 we went head first into the remaining tangos.


It's meat making time. Heavy roast, sliced and diced, Ginsu War-master Trophy earned!


At this point I thought I was stuck, hit the wall, dead in the water on a dead end road, er something like that, then I remembered the special weapons pockets on the Kodiak. Going in as going back or looking for a can opener in the kitchen would be a fools errand. Success!


Mopping up time, we're in the home stretch, vegetables have been simmering waiting for the beef airdrop.


Beef into the fray, let 'er run and voila!


Happy Birthday sweetheart, though I may have enough illumination devices to provide 2 gigazillion combined lumen, you still shine brightest in my life.

25 December 2010

Time for some updates...

Been a while since my last post, tremendous amount of road time, hunting season, work, more doing than talking so it's time for an update. 

It'll take some time to get all of my updates posted so I am just going to start with some highlights to some reviews that I am working on.

I want to do an update to the Steger Mukluks review, we've gotten quite a bit of white stuff so far this year and I have been able to get some snowshoe trekking done.

New blades to review:
SOG Aegis It's become my EDC.


BK&T BK 9, it's no secret that I'm a Wetterlings man when it comes to bush chopping, however I ran into a proposition I simply could not turn down.


BK&T BK2 Companion, I've been using a ESEE RC5 for a number of years now and I've been quite satisfied. Since the BK2 came with the BK9 I thought I'd run it through it's paces this winter and provide some feedback.


 BK&T BK11 "Becker Necker", I found myself looking for a new neck knife, my old one now somewhere in the Boundary Waters Wilderness. I was trying to decide between the ESEE Izula and the BK11. Price point and the fact that I have some other Becker's to review I settled on the BK11 for now.


New Camera!
Fujifilm Finepix S2800HD
Needed something to better visually document scenery, products as well as the life and times of a backwoods bum!


New Tent(S)!
Four season two person GSX Tundra. So far so good here. This was a relatively unknown tent throughout it's production. Original retail was over $200, I capitalized on an opportunity to pick up two of them new, for $150. I have to say that so far this is looking to be the bargain of 2010. Even in high wind and heavy snowfall these guys have held their ground extremely well. The only thing I could find on the market that is somewhat comparable is a MSR Fury. I'm quite pleased with this purchase so far.

New Pack:
Maxpedition Gearslinger Kodiak, not intended for my excursions in the wild, rather I was on the market for a new EDC bag for work and travel, I decided to give this bag a whirl for a number of reasons.


New torch:
Fenix TA21 225 lumen, 12 settings.  I'm still using my Surefire E2D Executive Defender on all my road trips and EDC. I've had a 9v and a 12v XPG Xenon lights from Cabela's for a number of years now and while they have provided great service they are heavier than most, run hotter than most, and have had to have the lamp assemblies replaced a couple times now. I was looking for an upgrade, good friend of mine in the bureau suggested I check out Fenix, in particular the TA21. I've been pleased so far and hope to have that review up soon.


Most of these products have been available for quite a while now, I tend to not start at the bleeding edge and rather try to focus on the leading edge in a particular class. I'm not a fan of working with gear that has no track record to speak of, I'd rather wait for some initial reviews, bugs to be cleaned up and prices to drop before I jump in.

Should have my take on things shortly into the new year.

Merry Christmas folks, and have a Happy New Year!


11 October 2010

Sunset today...

No need for words.


Latest obsession, sort of.

I've become intrigued with utensil carving, how odd is that?

I've seen some of the carvings done and I am blown away at the detail and skill. Most of these are done with a small bushcraft knife and a hook knife. Well I have not gotten my hook knife yet, I'm ordering one this week, for the time being I decided to give this a shot with a basic old Hudson Bay styled butcher knife. The results are not exactly works of art, but for twenty minutes and an old butcher knife it isn't so bad.

I had a good time doing it and I'm certainly looking forward to mastering the skill needed to produce much better specimens. Started with a large chunk of Birch wood.


Splitting that down with a bit of light baton work I had the following two pieces to work with.


From there, about twenty minutes and a lot of chips flying I ended with this. Still need to do some sanding and fine work. Serviceable as they are.


08 October 2010

Fire- Cattails & Jute Twine

I've seen this method before, wanted to show how I do it and a slight twist to the usual recommendation.
You'll need some simple ingredients to get started.

1. Paraffin wax
2. Jute twine (I use the small stuff but many suggest the bigger twine)
3. Pot to melt the wax in
4. Knife
5. Fire

Word of caution, once melted the wax is quite flammable, your wife, if you use one of her pots, is also flammable.


If you use a camp fire, use caution as the heat level is not as easy to regulate as your stove top. I like doing it outside so I used a small fire.


Once I've got the fire going and waiting for it to burn in a bit I cut the twine, 8 to 12" in length.

With the fire about right I'll put my melting pot on with a couple blocks of wax.


Once the wax is melted I'll lay in the twine, I do not suggest putting a whole bundle in at a time.


Once they've been in a bit I'll pull them with a stick and lay them to cool.


Here is where things start to differ compared to what most recommend. Where I live, if I NEED a fire as in right now, I need it right now. I don't have the time or luxury of nimble fingers to pick and peel the jute apart to make it fibrous enough to take a spark from a firesteel. It would be winter, between -20 to -30 with howling winds, snow or freezing rain. In those conditions a man's fingers are not nearly as dexterous as in normal conditions. Fingers get stiff, don't want to move, hard enough to grasp the firesteel and striker. Something I usually do with mits on for that very reason, pulling jute twine into a fibrous nest with mitts on is impossible. (One of the other reasons my firesteel is large, built into a deer bone and easy to grasp, even with mitts.)

With that in mind, I like to twist or roll the waxed twine into lumps, or balls or squares as seen here:


Then I'll mix these up with old cattail fluff. It'll stick to the waxy jute. Further if you pull the jut a bit and get good gobs of the cattail fluff mixed together you can squeeze it back into a compact unit. The cattail fluff is very easy to ignite but it burns extremely fast. If you are using it in conjunction with waxed jute though it fires the jute which will burn a nice long time. Basically, your using the easy ignition point of the cattail to get the twine going. Most of what I have seen others recommend is pulling the jute apart to make your tender bundle. I like to use cattail fluff with the twine as it works much better for a fire right now situation.

If you've got it right, it'll look like this, as with all of my fires I really try to build them on a layer of birch bark. It's prolific here and a very nice fuel.


It'll take a spark very easily and spread to flame as well with little extra effort.


Incidentally, I used the left over melted wax to reseal my leather tinder bag. A pretty nice leather piece my daughter made for me.

The waxed jute twine and cattail fluff, travels light and easy and in good quantities.

Here's what the inside looks like, cattail fluff, jute twin, cedar and pine shavings also in there as well as a couple pieces of fatwood in the bottom.