
I've come to despise the first month of each new quarter, because of my work I travel heavily during those months. Of them all I think I hate traveling in October the most, the month for me that is just between fall and just ahead of winter. Our snows will come in November and while I love my snow I do enjoy the transition month of October.
I've finally gotten around to affixing my BisonGear Lost River to a MOLLE frame, setting it up for colder weather. I was surprised at how well the pack mated to the frame. This particular version is a generation IV. It carries very well but this isn't the first time I've humped this frame so that really wasn't a surprise. Here's a look at what it looked like for this weekend's outing.
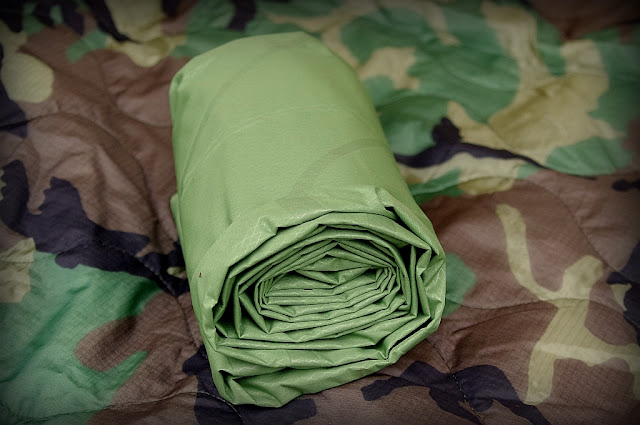
On top, inside of a cuben fiber stuff sack is a Mountain Serape from Hill People Gear. I'm thrilled with it so far, what a versatile piece of gear! It's a quilt, an insulated poncho, a great coat, and a sleeping bag good to around 40 to 45 degrees by itself. Here is a link to the discussion about the Serape and additional photographs.
Below that is a rolled up polyfil insulation jacket from Cabelas. It will compress nearly as well as down filled, but isn't worthless if it gets wet, like down is.
On the bottom is my 10x10 tarp with a woobie inside of it. I've found this to be a great way to carry this combination. Lay the tarp flat, put the woobie on top, fold over the sides to the middle and then in half once more. Roll it up. This keeps the woobie dry and eliminates needing to carry it inside the pack.


I was also carrying a Hill People Gear Kit bag. It's a chest pack for lack of a better way to describe it. I've been wanting to get my critical gear, fire, water, navigation, and other miscellaneous things I consider critical attached to my person. In the past I've used hip pouches, cargo pockets and so on but I've never really been satisfied with that set up. The kit bag so far, is shaping up to be an ideal way to carry that kind of gear.
Here's a few shots of how it carries and a little of what I have in it. I'm not going into great detail on the kit bag and what I've been carrying in it yet. I'm going to wait until I've had ample time with it first.


 The foray this weekend was to first and foremost find a little peace! I've been running hard for a while now and needed some woodstime to refocus. I also wanted to get a camp laid out that I'll be spending some time in later this winter. I wanted to try out a couple new pieces of gear too.
Obligatory shot of Ace on the trail.
 It didn't take long to get the campsite set up. A relatively simple affair, of a ridge beam lashed to a tree, the other end placed in a lashed up tripod. 10x10 tarp over the ridge beam, and a gear platform on one end. Pictures illustrate what I'm trying to say.


I picked up a Klymit Static V sleeping pad for use year round. I was very surprised at the specs for this pad and the price point for those specs.
From their website:

 Another shot for size comparison with my Adventure Sworn knife.
 Out of the stuff sack.
 Inflated.
 I put two timbers down, roughly seven feet in length, then several cross members making a bed that got me about a foot off the ground once it was all in place. Over that I tossed the woobie, then the sleeping mat.

Once all of that was in place I put the mountain serape in and brought the sides of the woobie up over and tied it closed over the serape. So far so good with the serape, the sheer functionality of it, the many different formats that it can be used in, along with the warmth versus weight ratio make it a very versatile and unique piece of equipment. A more thorough break down and review is in the works. I don't do table tops, I actually need to use something before I form an opinion about it.
As you can see below, it'll compress fairly well. This cuben fiber stuff sack is a 5" diameter by 12.5" tall (13 cm x 32 cm), 245ci. It fills it out quite well. I don't think it would fit in anything smaller than this. Makes for a firm package that straps to a pack nicely, and since this is the roll top type dry bag it is waterproof.


Here's the serape laid out on the pad.

 In the image above you can also see how the tarp is in closed formation. In the following images you'll see I pulled the front left corner up and tied it back. This is my preferred fair weather set up.


 The fire set up is somewhat of a departure for me. I always like to use reflectors when I can, either made from logs or rocks, banks if they present themselves. In this case I wove saplings between four trees, in and out. This gave me a framework to add larger limbs and rocks on the front face, and to lean larger wood against the back of the framework.


 This made for one of the largest and nicest reflector walls I've ever built. The lower third is made up of rocks, they reflect heat well, and they hold heat even better. Then the large logs on the back side work like charm. Sitting in the shelter with the heat reflecting back in made for a very relaxing break.
I'm looking forward to November and then the depths of winter. Work should slow down some until January anyway. I've been missing my woods something fierce here lately. It was good to get out again.
I've finally gotten around to affixing my BisonGear Lost River to a MOLLE frame, setting it up for colder weather. I was surprised at how well the pack mated to the frame. This particular version is a generation IV. It carries very well but this isn't the first time I've humped this frame so that really wasn't a surprise. Here's a look at what it looked like for this weekend's outing.
On top, inside of a cuben fiber stuff sack is a Mountain Serape from Hill People Gear. I'm thrilled with it so far, what a versatile piece of gear! It's a quilt, an insulated poncho, a great coat, and a sleeping bag good to around 40 to 45 degrees by itself. Here is a link to the discussion about the Serape and additional photographs.
Below that is a rolled up polyfil insulation jacket from Cabelas. It will compress nearly as well as down filled, but isn't worthless if it gets wet, like down is.
On the bottom is my 10x10 tarp with a woobie inside of it. I've found this to be a great way to carry this combination. Lay the tarp flat, put the woobie on top, fold over the sides to the middle and then in half once more. Roll it up. This keeps the woobie dry and eliminates needing to carry it inside the pack.


I was also carrying a Hill People Gear Kit bag. It's a chest pack for lack of a better way to describe it. I've been wanting to get my critical gear, fire, water, navigation, and other miscellaneous things I consider critical attached to my person. In the past I've used hip pouches, cargo pockets and so on but I've never really been satisfied with that set up. The kit bag so far, is shaping up to be an ideal way to carry that kind of gear.
Here's a few shots of how it carries and a little of what I have in it. I'm not going into great detail on the kit bag and what I've been carrying in it yet. I'm going to wait until I've had ample time with it first.


Obligatory shot of Ace on the trail.


I picked up a Klymit Static V sleeping pad for use year round. I was very surprised at the specs for this pad and the price point for those specs.
Weight: 18.1 oz,514 gThe pack size is extremely small, and very light weight. I can't even compare it to the old Thermarest pad I used to use, this pad rolls up smaller than a standard Nalgene bottle. I liked this format over the regular pads as the design makes it easier to stay on the pad versus the typical slick top flat pad. The channels improve friction, and they also hold air, increasing the insulation value.
Dimensions: 72" x 23" x 2.5",183 cm x 59 cm x 6.5 cm
Type: inflatable Sleeping Pad
Packed Size: 5" x 9", 12.7 cm x 22.8 cm
Includes: Stuff Sack, Patch Kit
Warranty: Limited Lifetime
From their website:
- The Klymit Static V is a lightweight camping pad using body mapping technology at an entry level price.
- It features the v-chamber design which limits air movement and heat loss while offering a uniquely ergonomic body map which is optimized for performance and comfort.
In the image below, the sleeping pad is on the left, mountain serape in the center, woobie on the right.
- Inflating in approximately 10-15 breaths it will save you time and energy wherever you are.


Once all of that was in place I put the mountain serape in and brought the sides of the woobie up over and tied it closed over the serape. So far so good with the serape, the sheer functionality of it, the many different formats that it can be used in, along with the warmth versus weight ratio make it a very versatile and unique piece of equipment. A more thorough break down and review is in the works. I don't do table tops, I actually need to use something before I form an opinion about it.
As you can see below, it'll compress fairly well. This cuben fiber stuff sack is a 5" diameter by 12.5" tall (13 cm x 32 cm), 245ci. It fills it out quite well. I don't think it would fit in anything smaller than this. Makes for a firm package that straps to a pack nicely, and since this is the roll top type dry bag it is waterproof.


Here's the serape laid out on the pad.


I'm looking forward to November and then the depths of winter. Work should slow down some until January anyway. I've been missing my woods something fierce here lately. It was good to get out again.
Good camp, good friend.
ReplyDeleteThanks Smythe!
DeleteGlad you were able to get in some woods time. That's a great looking camp and I really like the reflector wall you made. That's a neat idea with the woven saplings and rock stacking. I might be stealing your idea. Looks like a great place to dry out some clothes or gear too.
ReplyDeleteThanks OE. Feel free to try it. I hadn't really thought about it before, but when I saw those four trees in a semi circle the idea struck me, and since there' rocks all over that area it was pretty easy to do.
DeleteAce is looking right at home there - like he always belonged there.
ReplyDeleteDidn't you have a bushcraft spot/primitive homesite you were working on last year? Is that where the camp photos above were taken? Any plans to work on that some more this year?
This is a different area. I still want to work on the primitive camp area and will do so eventually. The problem is, when I started that one it was a promotion and a whole lot of responsibility ago. There's just so little time now, it's gotten hard to spare any of it for that project. It'll happen, just a matter of when.
DeleteVery nice woods camp. I just found your blog through the rabbit hole and I am looking forward to thumbing through more of it.
ReplyDeleteThanks Peter, appreciate the words. Hopefully you'll find it useful, or at least entertaining!
DeleteVery nice gear and shelter setups/configs. Looks like you're ready for come what may. That's quite a fire reflector, as well. :)
ReplyDeleteGlad you were able to get out for a charging/healing session. I'm due for one, myself.
Ahh yes... the stresses of everyday life, the blessings of a promotion...
ReplyDeleteBut.... Your chosen surroundings and setup certainly look good to me!
I also really like your reviews here. A lot makes sense.
First time visitor here.
ReplyDeleteNice camp!
Looking forward to reading/visiting more.
That chest bag is almost a clone of the Maxpedition Active Shooters Bag, minus the PALS system, of course.
Great post. Looking forward to a Bison Gear pack of my own soon.
ReplyDeleteStill lovin mine, makes me wish I hadn't waited to long to get one.
DeleteVery well done. The Serape looks very interesting. Have you had any experience with the Kifaru woobie?
ReplyDeleteIt appears that Kifaru has come out with a serape-like product, but it doesn't seem to be as nice as the Hill People serape. I'm curious as to the difference in the materials that each uses.
DeleteI'd need to dig in pretty deep to be able to honestly compare them. I don't believe products can be objectively reviewed and compared by way of conjecture and wild ass guesses. I think you have to actually own something to have an honest and worthwhile opinion.
DeleteA friend of mine who is currently deployed in Afghanistan has both products and is formulating an opinion of both while in the mountains there. Should make for some good feedback when he returns.
Is it a tight fit for the serape in that dry bag? I want to use it in the same manner you have but I want to be able to pack it quickly for a speedy bug out
ReplyDelete